
Remote Desktop for Windows
Setting up Remote Desktop using Windows 7 and 10
If your off-campus/home computer is Windows, please follow the steps below.
Step 1: Connect to the 2-factor VPN
- The first thing you must do is establish a VPN connection. Instructions on how to connect to the VPN can be found here: https://www.bumc.bu.edu/it/support/network/remote/vpn/vpn-instructions-for-windows/
Step 2: Set up the Remote Desktop Connection
- Open “Remote Desktop Connection”. This can be found by searching for it in the search bar in the bottom left hand corner or under “Windows Accessories” in the program list.

- In order to establish the connection, you will need to know the name/6-digit asset tag number of the Windows computer you want to connect to. The format below is the way it should be entered. **Replace the X’s with your asset tag** (i.e. BUMC-PC987654.ad.bu.edu)
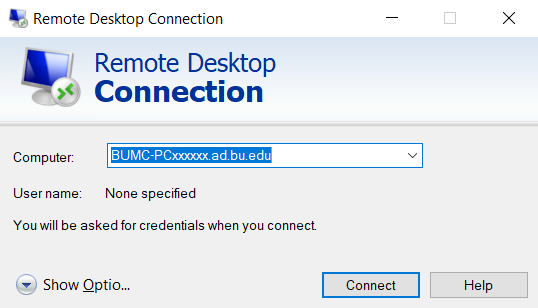
- Once you enter the full computer name, click “Connect”. The window below should appear. Do the following:
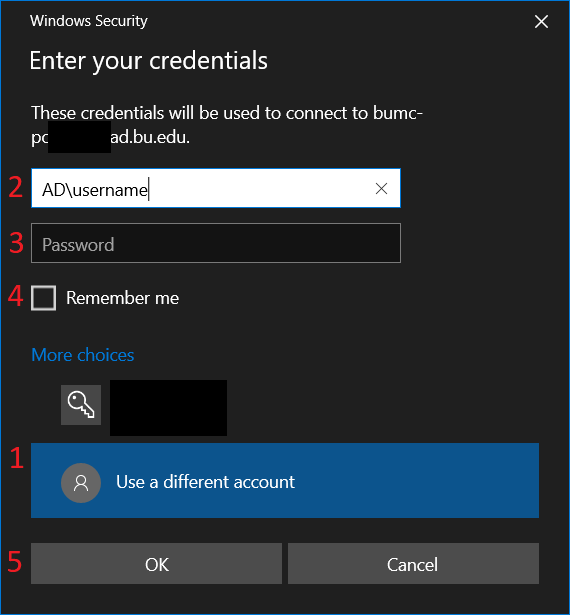
- Choose “Use a different account”
- In the username field, enter your username with the format AD\username (i.e AD\johndoe1)
- Enter you Kerberos password.
- Check off Remember me
- Press OK.
- You should now be connected to the remote PC.