Home » Support & Infrastructure » Storage Options » BUMC Y Drive
Connecting to the BUMC Y Drive after network changes
On June 30, 2015, users will no longer be able to map to the “Y Drive” using the address bumc.bu.edu/bumc.
Previously, \\bumc.bu.edu\bumc was used as an easy-to-remember alternative to \\ad.bu.edu\bumcfiles, or as a workaround for users who were having issues with ad.bu.edu. However, we need to implement a change to resolve an ongoing issue with the Medical Campus website. Before, if you typed “bumc.bu.edu” in your browser’s address bar, it might return an error message that the page could not be found–you would instead have to type “www.bumc.bu.edu.” After the June 30 change, both bumc.bu.edu and www.bumc.bu.edu will work as addresses to the BUMC website.
However, we understand that this may impact users who have relied on bumc.bu.edu as an address to access their resources on the Y drive.
You can correct your mapping before the change is implemented in order to enjoy uninterrupted access to your files and folders.
Note: in the document below, ad.bu.edu\bumcfiles is used as the “correct” mapping in all of the examples. If you have issues using ad.bu.edu for whatever reason, you may also use filesrvs.bumc.bu.edu\bumc in its place. If you are already using this address, it will also continue to work after the network change occurs.
You can click on any image in this tutorial to see it in full size.
What is the full path to my drive?
To map to a folder, you will need its full path. The root directory of the Y drive is located at ad.bu.edu/bumcfiles.
You might already know the full path to what you want to map, but if you don’t, the organization within bumcfiles is fairly straightforward.
BUSM departments are within the BUSM folder, as with SPH and GMS. “Administration” contains campus offices not specific to any one school. “BUMC Projects” contains special project folders. Some services that work with both Boston University and Boston Medical Center are located in “Shared Services.” If in doubt, talk to a department admin about the location of your department’s resources.
Full paths are formatted in descending folder order, and look different on Macs and PCs.
On a Mac, you’ll map to your full path using the Samba protocol, or smb, and forward slashes. Example: smb://ad.bu.edu/bumcfiles/Administration/Office of Information Technology/Dept
On a PC, you’ll use backslashes instead, and no need to use smb. Example: \\ad.bu.edu\bumcfiles\Administration\Office of Information Technology\Dept
Your personal folder is usually located in the same directory as your Dept folder and is named with your BU login username. Example: \\ad.bu.edu\bumcfiles\BUSM\yourdepartment\yourBUlogin OR smb://ad.bu.edu/bumcfiles/SPH/yourdepartment/yourBUlogin
How to tell if you are currently using bumc.bu.edu/bumc to map your network folders
On a PC
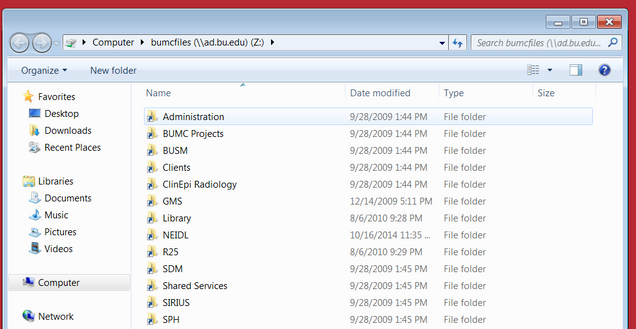
Go to your Computer window (called “This PC” in Windows 8). You can click on Start and then Computer, or simply search for Computer.
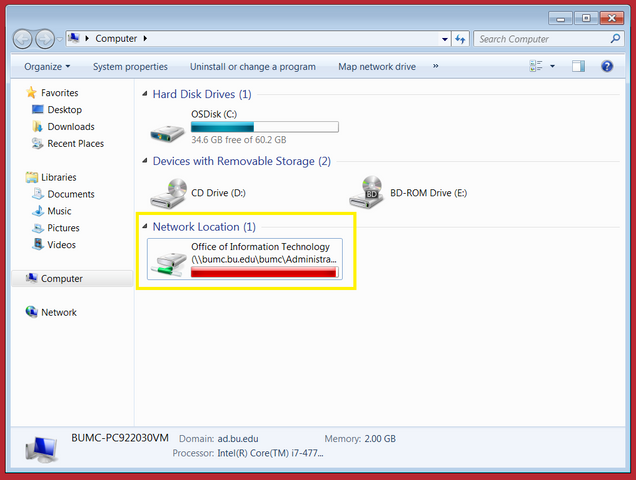
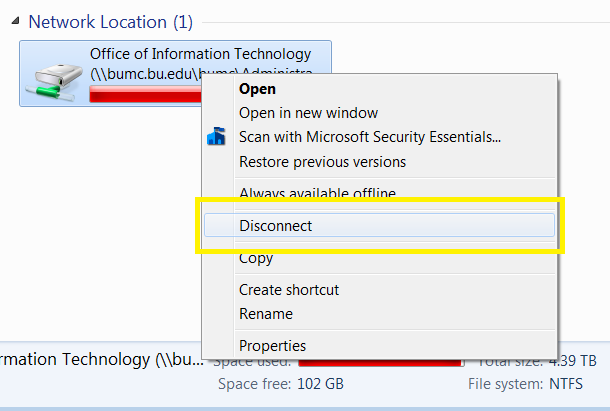
Under “Network Location(s)” you will see your mapped drives and their addresses. If your drive is mapped with “ad.bu.edu” or “filesrvs.bumc.bu.edu” you do not have to do anything–your drive will continue to work. However, if it says bumc.bu.edu, you will have to re-map your drive.
On a Mac
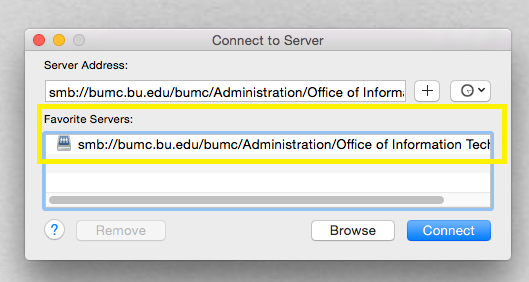
In Finder, click Go in the menu bar, then go down to Connect to Server.
If you’ve been using a “favorite” server address to connect to the Y drive, it will be listed here.
If you use a desktop shortcut to access your Y drive files and don’t have any favorites listed under Connect to Server, we can still find out which path you’re using.
First, make sure you’re connected by navigating to one of your Y drive folders using your shortcuts.
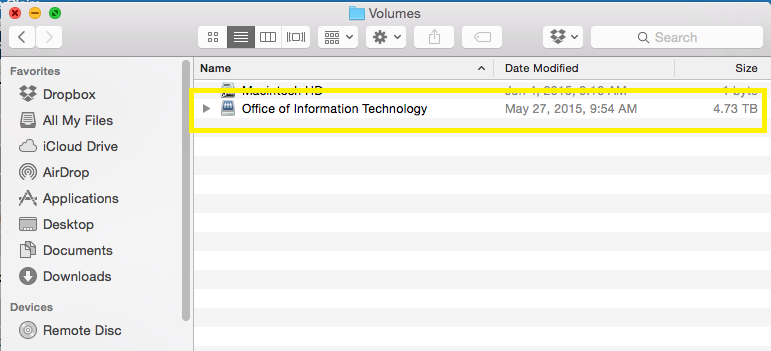
Then, click Go in the Finder menu bar, and Go to Folder. In the dialog that pops up, type /Volumes/ and hit Enter.
You’ll see a shortcut to your Mac hard drive, as well as a mounted server.
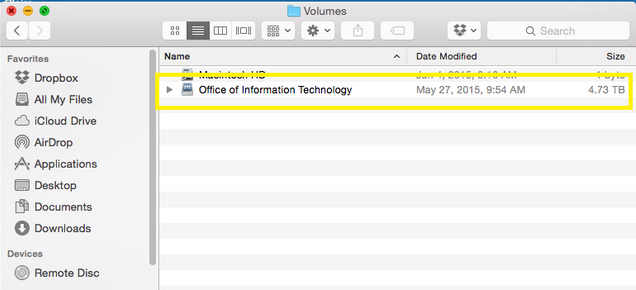
Select that server and hit the Command+I keys to open the file info window. You’ll see the path to your server listed under Server.
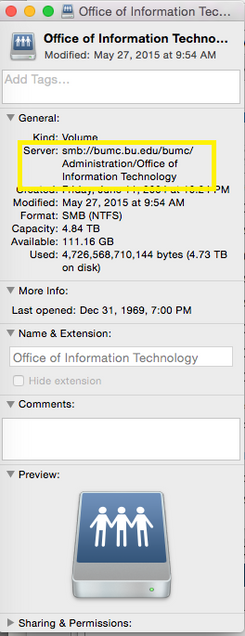
If your drive is mapped with “ad.bu.edu” or “filesrvs.bumc.bu.edu” you do not have to do anything–your drive will continue to work. However, if it says bumc.bu.edu, you will have to re-map your drive.
How to recreate your shortcuts and mappings using the correct address
On a PC
First, right click your old mapping in the Computer window and select “Disconnect.”
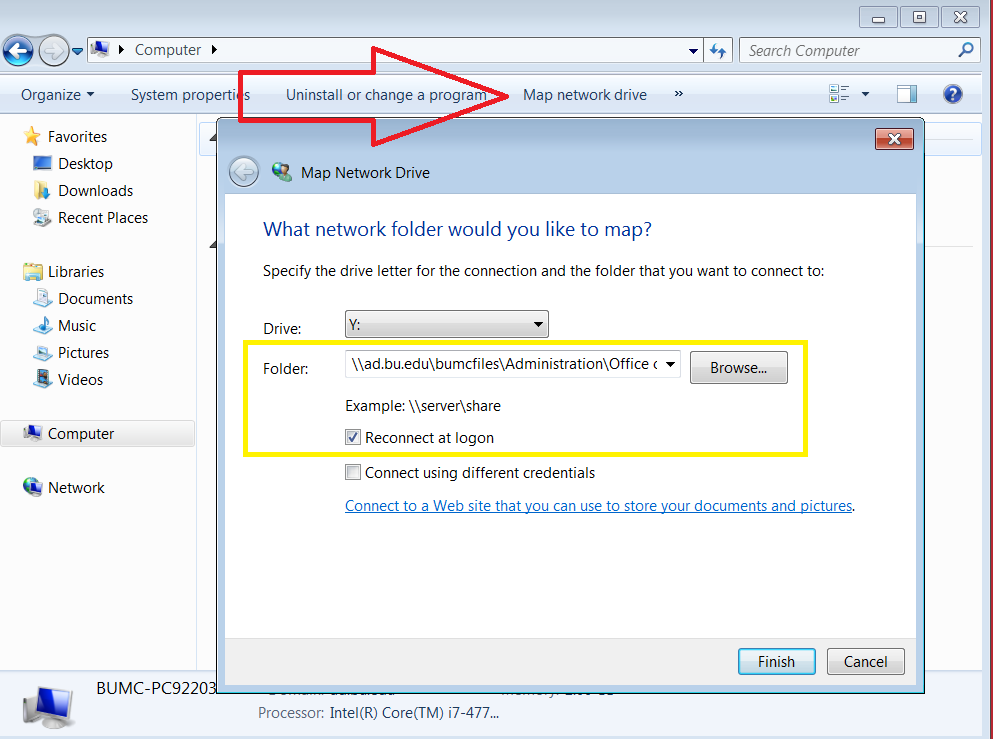
Then, select “Map network drive” from the File Explorer window.
Type the correct addresses for the folders you want to map.
Examples:
\\bumc.bu.edu\bumc\SPH\yourdepartment\Dept
\\bumc.bu.edu\bumc\SPH\yourdepartment\yourBUlogin
becomes
\\ad.bu.edu\bumcfiles\SPH\yourdepartment\Dept
OR
\\filesrvs.bumc.bu.edu\bumc\SPH\yourdepartment\Dept
\\ad.bu.edu\bumcfiles\SPH\yourdepartment\yourBUlogin
OR
\\filesrvs.bumc.bu.edu\bumc\SPH\yourdepartment\yourBUlogin
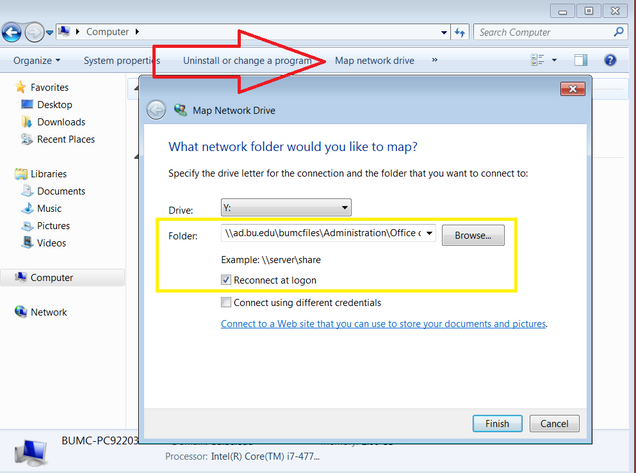
When mapping each network drive, select “reconnect at login” to save these mapped drives for later use. If you’re on campus, they should reconnect whenever you are connected to the BU network. If you’re off-campus, you can resume connection to them once you’re connected to the BUMC VPN.
On a Mac
In the Go–>Connect to server window, you can add the correct mappings to your favorites list. First, select your old mapping, and click the Remove button.
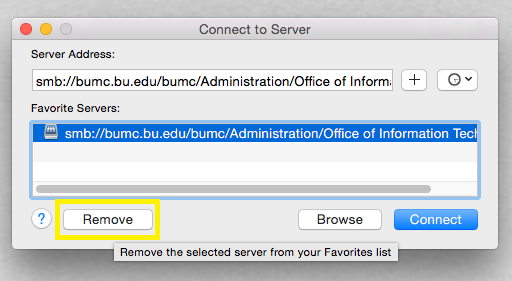
Then type the correct address in the Server Address box instead and click the plus sign.
Examples:
smb://bumc.bu.edu/bumc/BUSM/yourdepartment/Dept
smb://bumc.bu.edu/bumc/BUSM/yourdepartment/yourBUlogin
becomes
smb://ad.bu.edu/bumcfiles/BUSM/yourdepartment/Dept
OR
smb://filesrvs.bumc.bu.edu/bumc/BUSM/yourdepartment/Dept
smb://ad.bu.edu/bumcfiles/BUSM/yourdepartment/yourBUlogin
OR
smb://filesrvs.bumc.bu.edu/bumc/BUSM/yourdepartment/yourBUlogin
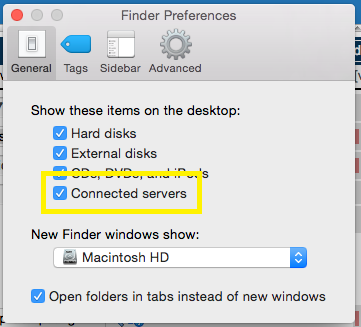
If you like, you can make sure that your connected servers always display on your desktop in OSX. Go to Finder–>Preferences and make sure “Connected servers” is checked. This can be an easy way to tell whether you are connected to the Y drive at any given time.
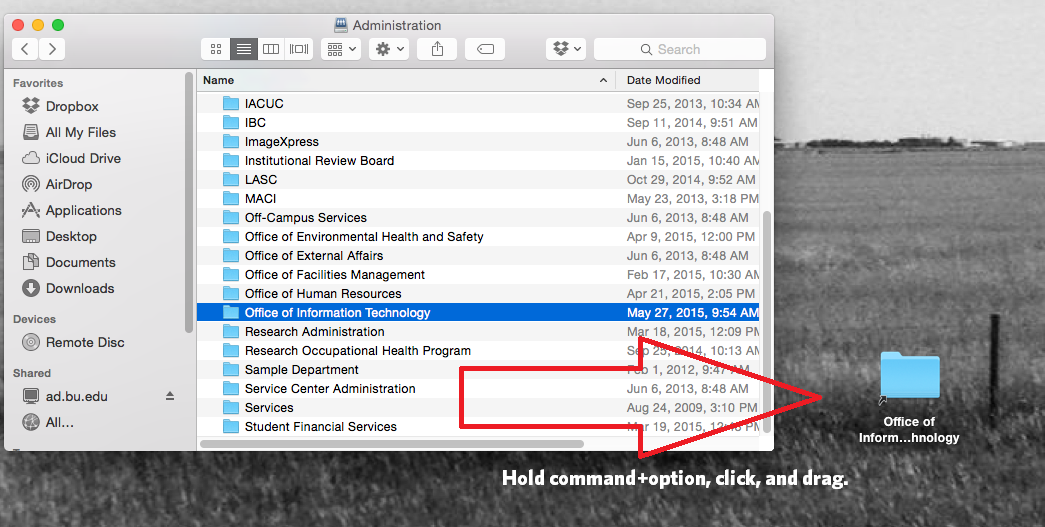
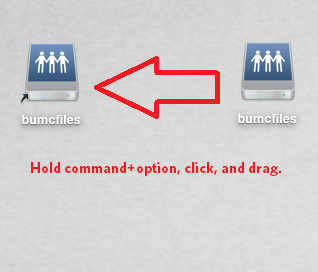
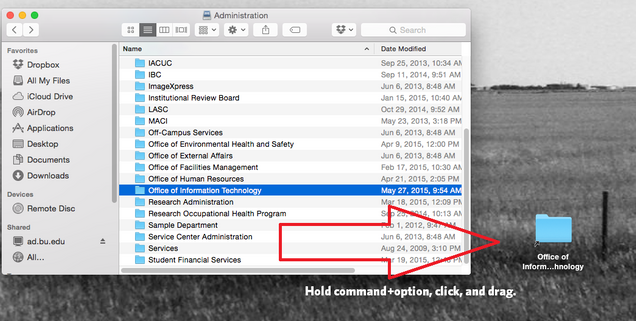
To create a shortcut to any server or Y drive folder, simply select it and hold Command and Option while dragging it to the desktop. A small arrow will appear next to the folder or server icon indicating that the copy you are making is an alias. You can use this shortcut to directly access a folder or your server connection from your desktop, without having to navigate to Go–>Connect to server.
If you’re on campus, you can access your folders whenever you are connected to the BU network. If you’re off-campus, you can resume connection to them once you’re connected to the BUMC VPN.
Some versions of Mac OSX have also had issues with connecting to the Y drive using the ad.bu.edu/bumcfiles address when using the Cisco AnyConnect VPN client. You can also set up a Cisco IPSec connection natively in Mac OSX to work around this issue. Instructions on how to do this are located here.
If you have any questions or concerns about your server connection, or need help completing any of these steps, please feel free to submit a ticket anytime or contact us during our business hours, 8:30AM to 5PM, Monday through Friday.